Sunday, March 20, 2016

The Builder Friendly Waterproof Hatch, Episode 1.

If your looking to put large "dry" storage onto your boat this post may help you out.

This all started when I decked my last two boats. To provide access to the space created by the decking I used round plastic hatches and semi dry hatches made of plywood secured with thumb screws. The time spent on these boats has made me realize the hatches need improvement.

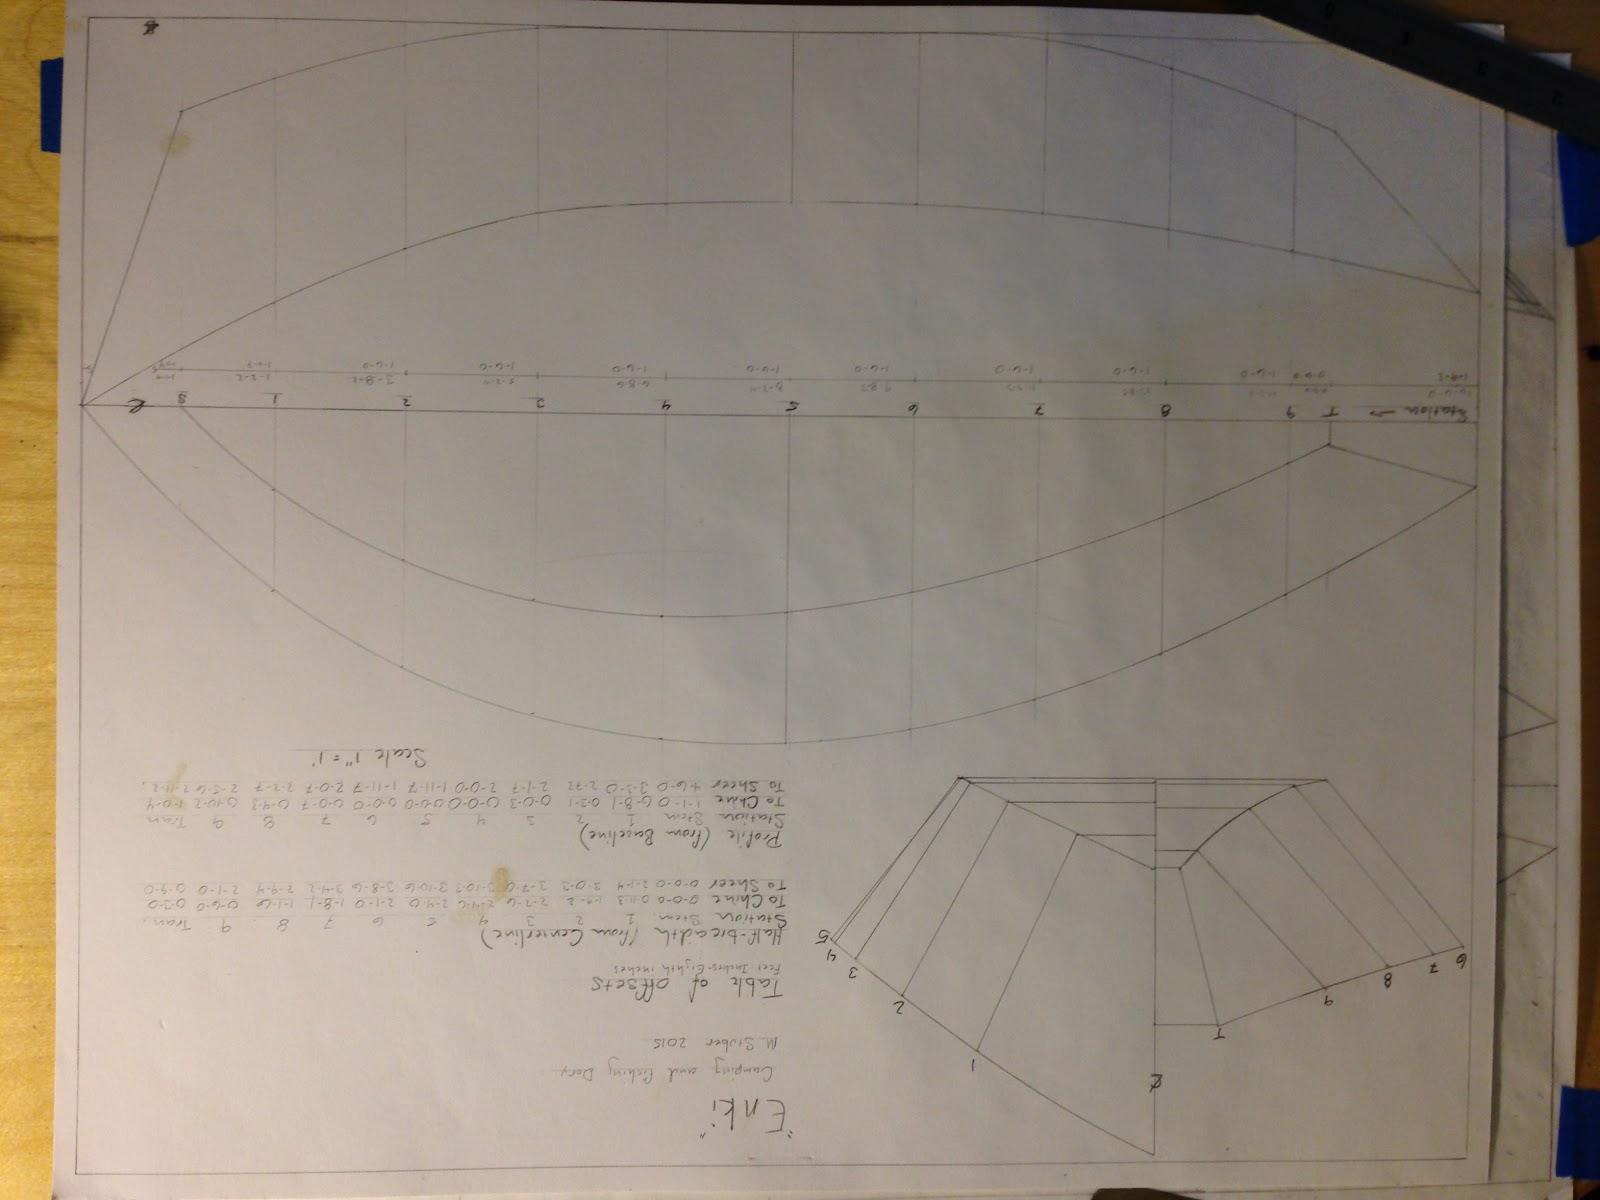
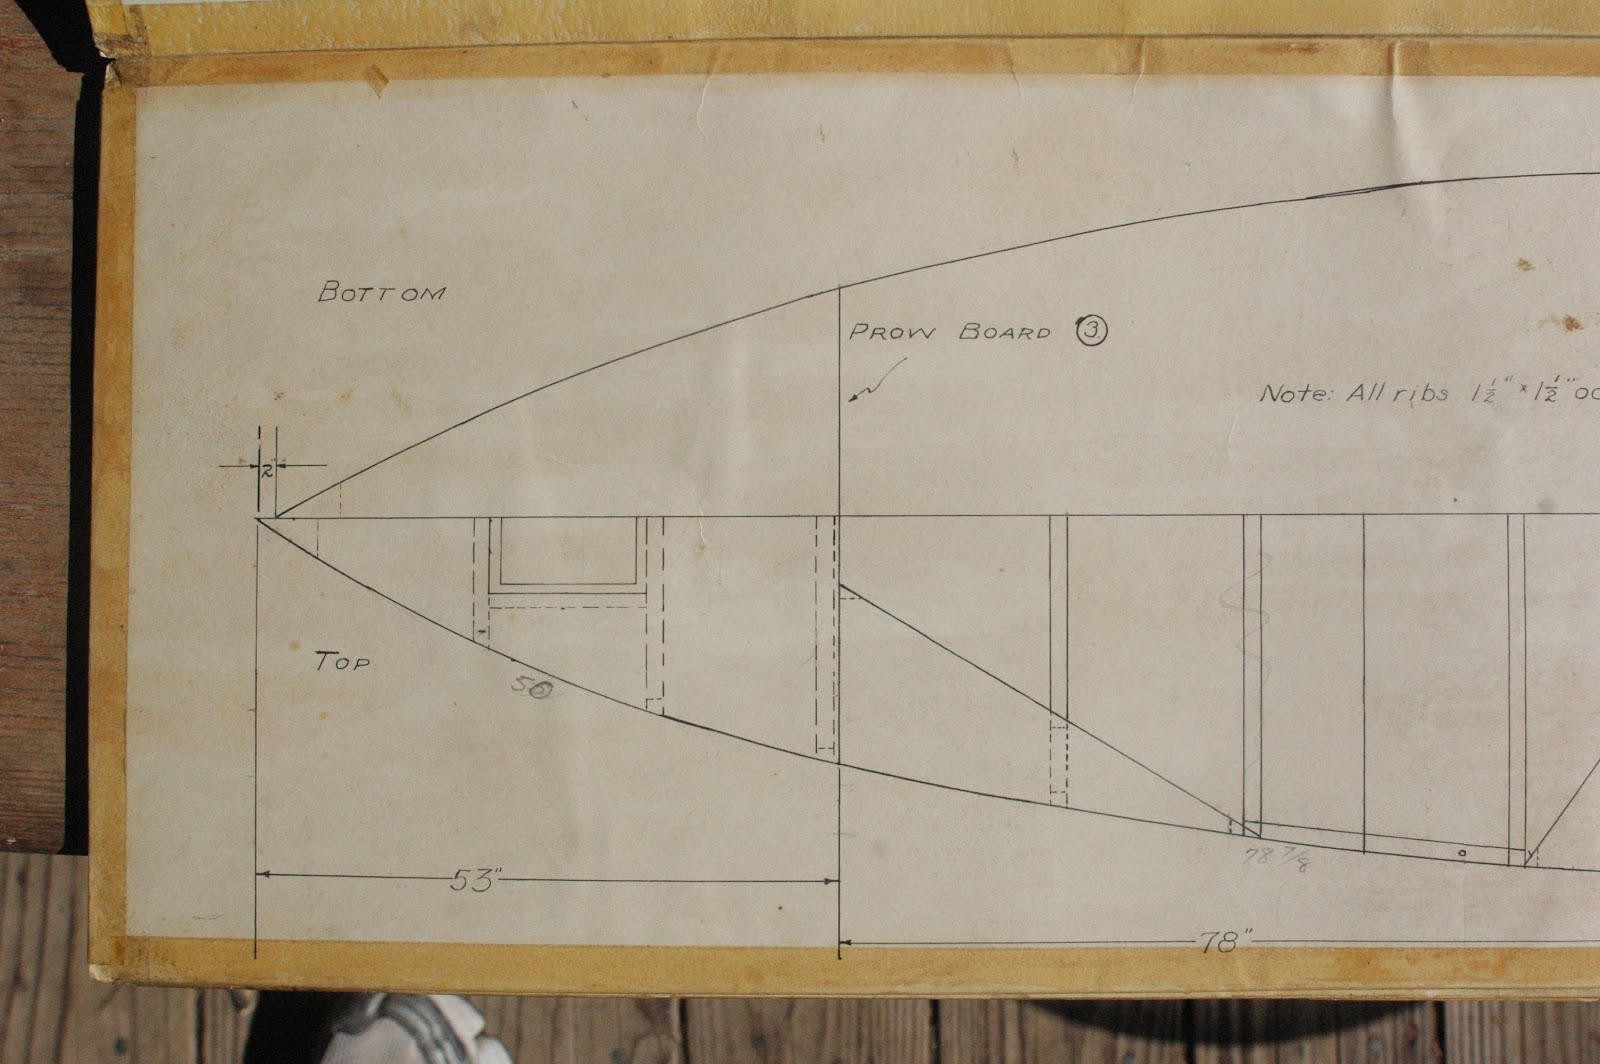
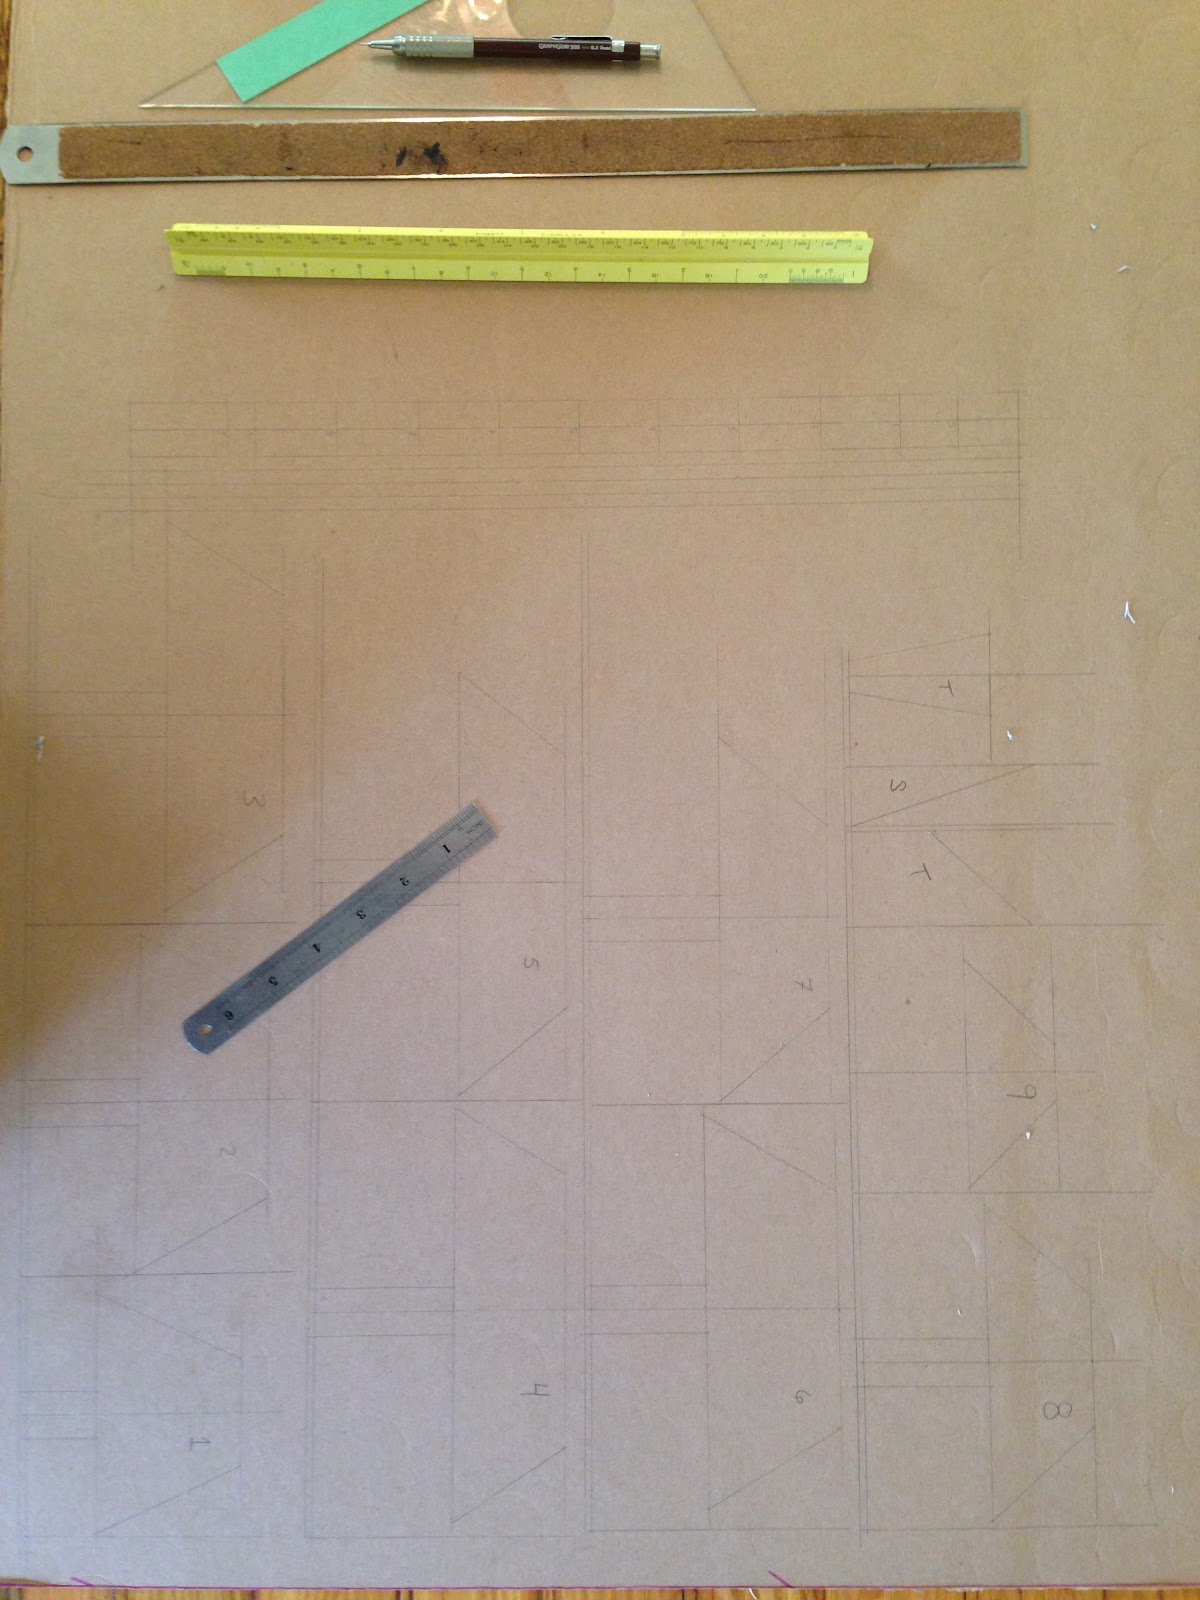
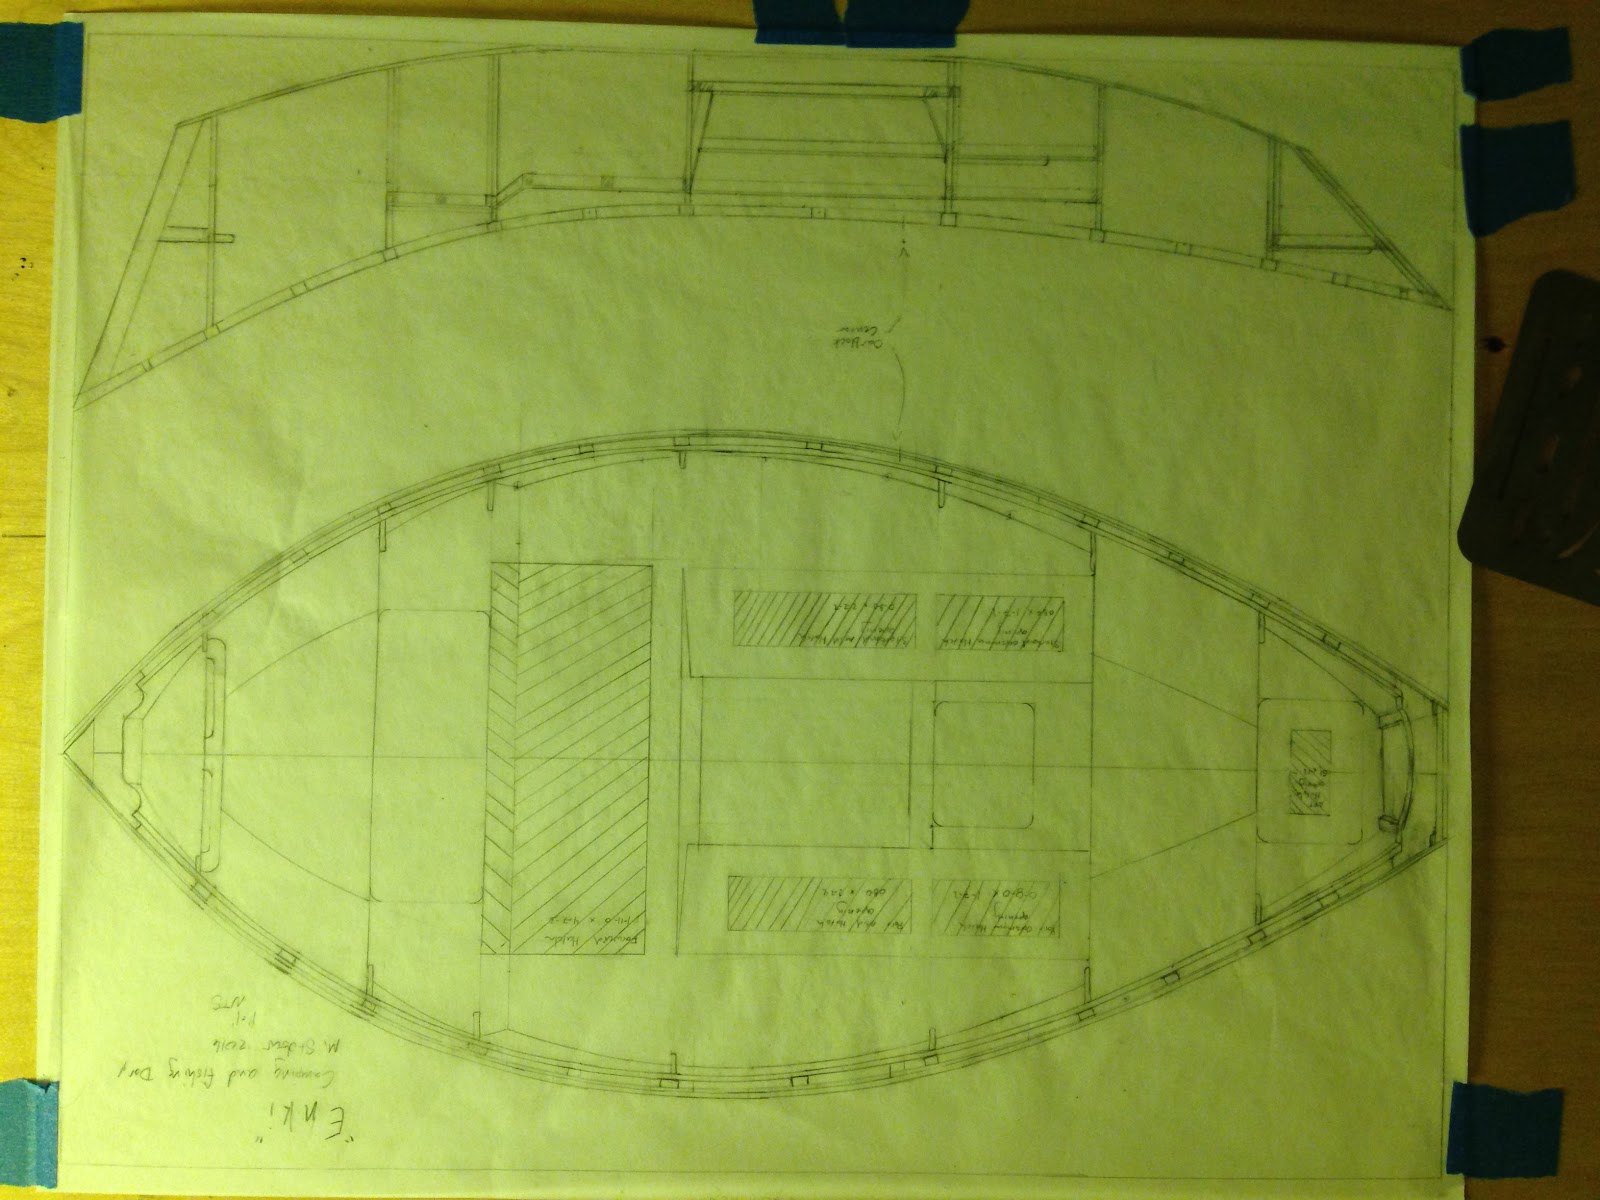
Working on the build plan for Enki I began to puzzle out how to build flush water tight hatches for her large storage compartments. Even though this build might be a little ways off I couldn't resist doing some drawings and making a model.


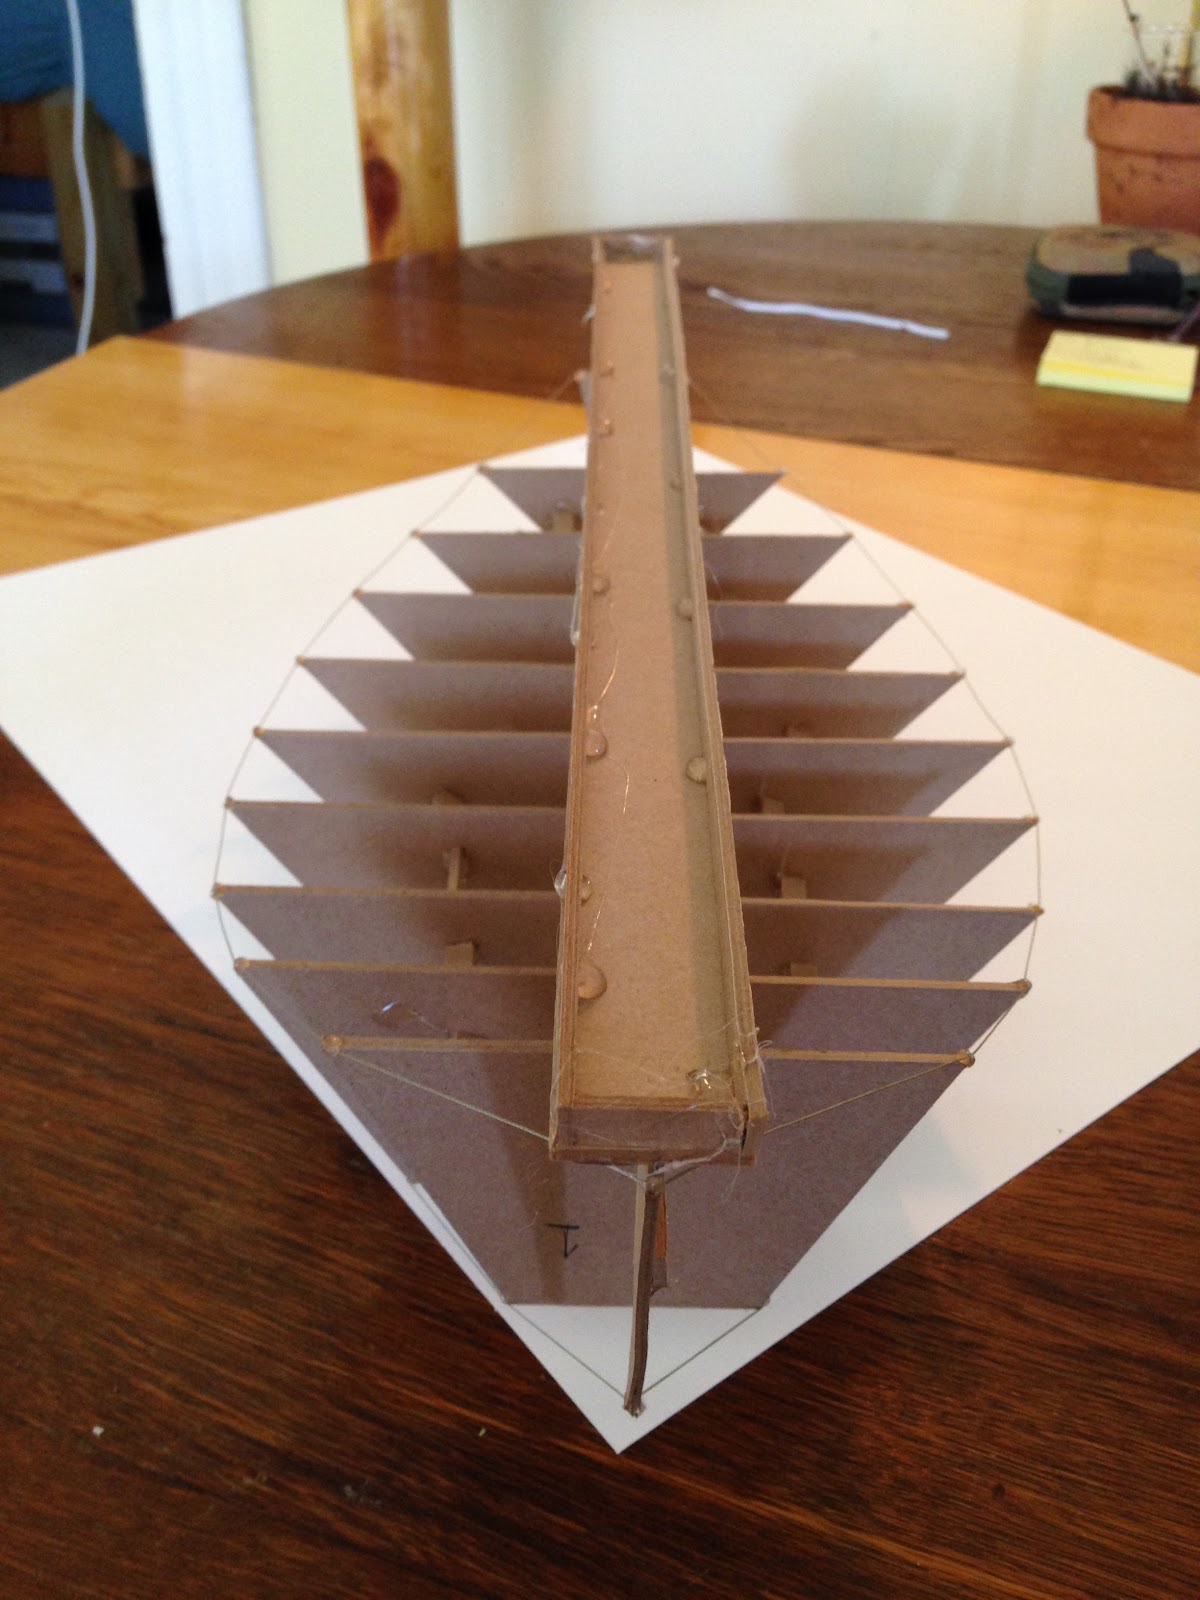
My idea behind the design was to create a gutter system using strips of 1/4" plywood. I am planning on using 1/4" plywood for the decking hopefully most of these strips come from decking scraps.

I started out by deciding where I wanted the hatch edge to be. Using a pocket saw I cut the Hatch out. This will save on plywood by using the wood removed from the opening as the finished hatch top.

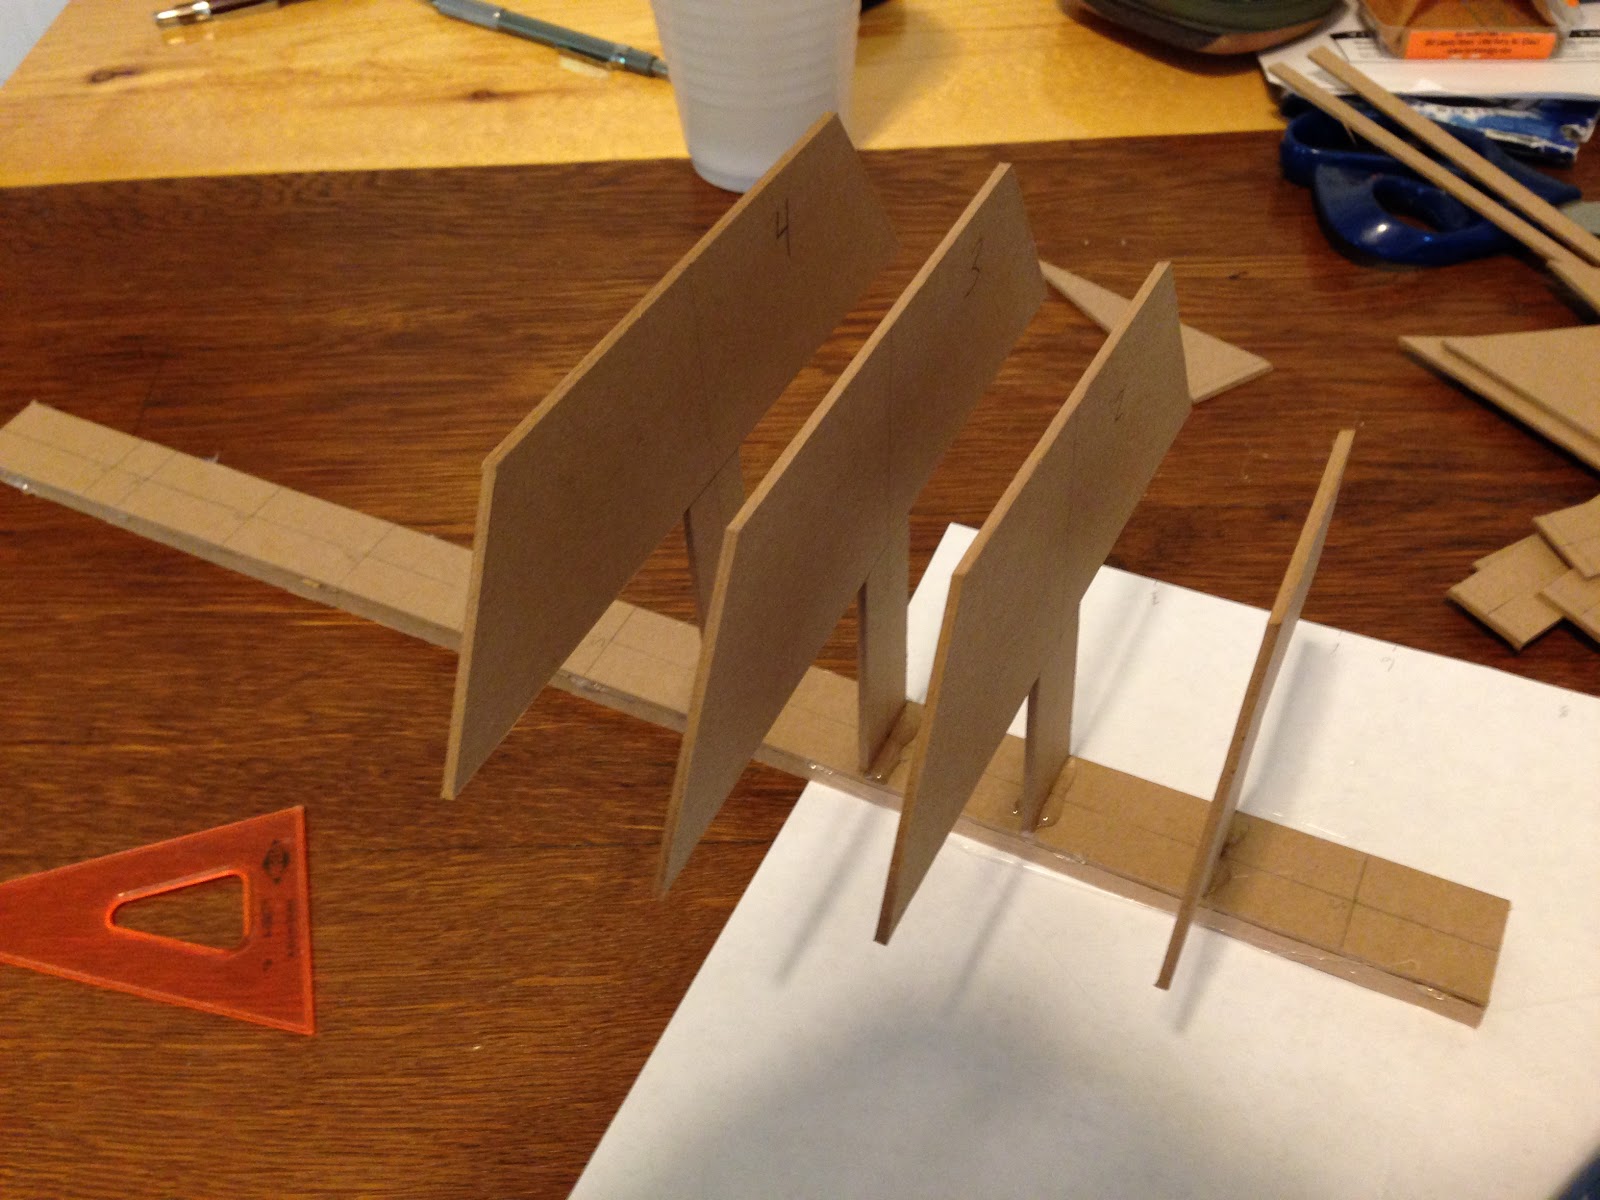
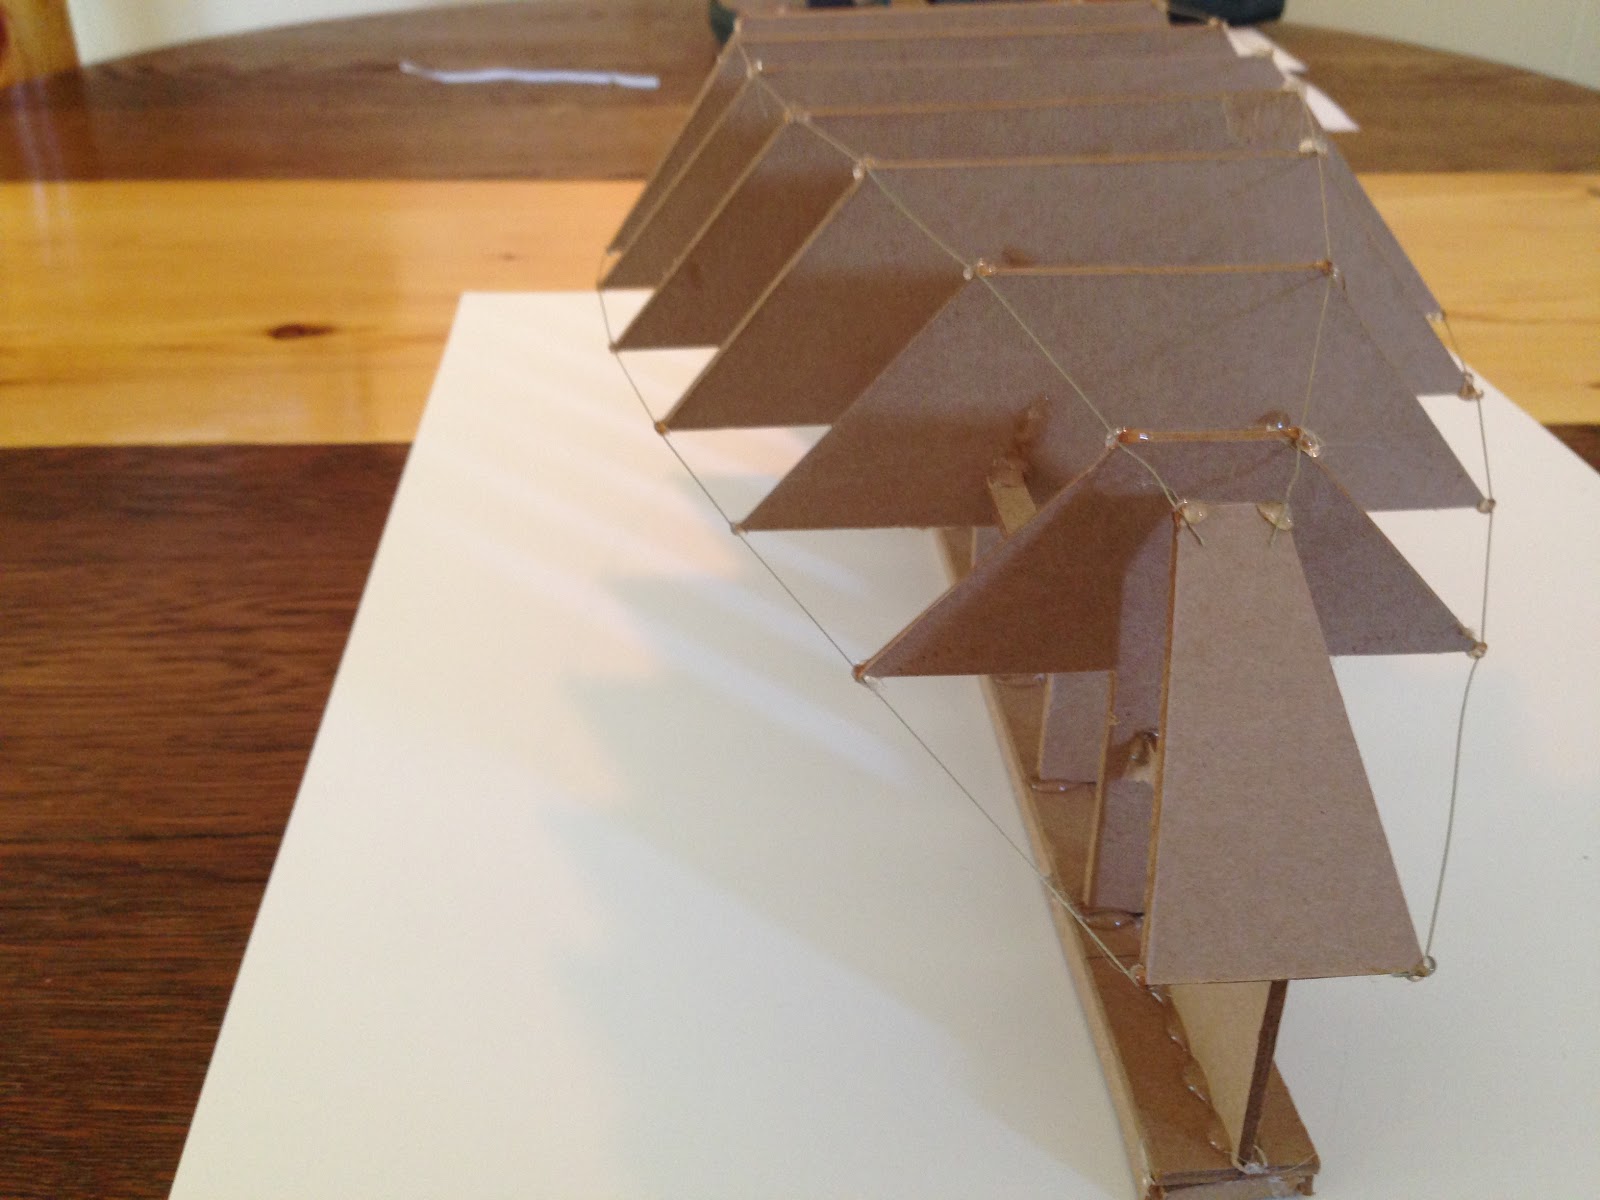
The deck beam layout is important to support the finished hatch. For the model I installed the beams after cutting out the hatch. In a boat the beams would be installed before the hatch gets cut out.

After removing the hatch top I glued the gutter strips onto the deck and the lip on the hatch.


Once this all set up I dry fit the hinge and the latch.


Well this all worked so good I couldn't just waste the hatch.


Now I have a really great box and I learned some stuff. First off there should be a gasket in the gutter. For the final build I'm going to try and find a durable gasket material and add it into the design. The latch itself never needed the handle on top of the upper round so I never built it. I also see a very easy way using a spring/bungee to hold the latch closed (good if the boat is capsized in the river). I also have some ideas to reduce the amount of water that can leak in through the bolt hole in the latch (in reality I don't think its enough to worry about). Another thing to think about is structural framing under the hatch itself. If its a big hatch this will not only stiffen up the hatch but it will help keep it from warping.

Ok so there it is. Hopefully this all scales up nicely.

Tuesday, March 8, 2016

Enki Build Plan (Part 1)

***I would like to apologize for the format of Build Plan. I am copying it from a word document and the formatting doesn't follow. The more I try and fix it the worse it gets. If you would like this information as a PDF comment and I will make it happen.

Enki
Camping and Fishing Dory
M.Stuber 2016

Build Plan

One of the interesting things about boat building is the number of ways you can put together a boat. If you are reading this thinking about your first boat project let me be the first to say be carefull. If you have limited or no boat building experience and are interested in the Drift Boat hull check out some books on the topic like Roger Fletcher's Drift Boats & River Dories. There you will find a the free form method of building.  This is a great method for building a copy of a boat. With the original boat on hand one can take the lines off of the boat build the parts and assemble. If you want your first boat to be a drift boat I recommend the free form method or a kit.

This build plan is going to use a combination of the free form method described in Fletcher's book and the strong back method. I will do my best to explain why I chose to do things the way I have. I also plan on following this little document when I build the actual boat, it's gonna be fun to see what little problems I come up with as I go. So let's begin at the beginning.

Lines Drawing

IMG_6607.JPG
Fig 1. Enki lines drawing
  • If you are building from a set of plans you have already completed this step.
  • The lines drawing is a scale representation of the hull. On a drift boat hull you will get the location of the sheer, chine, stem, transom, and station lines. This is the basic shape of your hull.
  • Additional important information on the drawing is the table of offsets. On this drawing the offsets are given as three numbers. These numbers are feet, inches, and ¼ inches, so 2-6-4 is two feet six and ½ inches.
  • Enki (fig 1) is a hull of my own design. I based her on several classic Colorado River boats. If you are interested in your own design  your going to need to learn to loft. There are several good books on the subject like Greg Rossel’s book, Building Small Boats or Lofting, by Allan H. Vaitses.

DSC_0025.JPG
Fig 2. 1949 AK Reynolds lines drawing of Norman Nevills Cataract Boats.

  • Two good reasons to do a lines drawing along with having the factory plans are,
    • the ability to recognize inaccuracies in the given plans.
    • a beautiful hand drawn set of lines to go with your boat.
  • Many if not most Iconic river dorys began as a lines drawing (fig 2).


Model

IMG_5265.JPG
Fig 3. Enki model drawings.

  • If you have plans you can skip this step. If you're building a new design this is a good idea.
  • I like to use heavy cardboard hot glue and thred.
  • After laying out all of the parts and pieces using information on the lines drawing cut them out and assemble (fig 4).

IMG_5283.JPG
Fig 4. Assembling the stations

  • With the completed model you can now really have a look at the shape of the hull (Fig 5 and 6).
IMG_5288.JPG
Fig 5. Looking down onto the Bow of the Enki model.

IMG_5296.JPG
Fig 6. Looking at the transom and bottom of the Enki model.

  • If everything looks good it’s time to move on to the construction drawings.


Construction Drawings

  • I like to create my construction drawings using the lines drawing and tracing paper.
  • These drawings need to be as accurate as you can get them. They will not be the final say however so don’t get overly concerned if your pencil lines can’t accurately represent something like a ¼ or 1/16 inch.
  • This is your first opportunity to layout seating and or decking. Layout oar positions adjust frame spacing and even see if that cooler you’ve always wanted will fit.

IMG_6619.JPG
Fig 7. Construction drawing for Enki.

  • Take your time and have fun with the drawing process.
  • The creation of the construction drawings are another point you can find mistakes.

Saturday, March 5, 2016

It has been a while.

Well, its hard to believe it has been almost seven months since my last post. I have a really good reason, becoming a father creates some really hectic times. Anyhow this is Elsie, she is the one making my life interesting right now.

She looks a lot older these days and I'm sure she will make it into some of these posts as we move further towards the water season here in Montana.

After having my oars stolen on the Yellowstone I thought perhaps they would turn up before the winter set in, they never did. The replacements work great and I was able to put quite a few miles on them before I switched them out for skis. They are currently napping in the basement.

Winter arrived with a bang then went elsewhere. The first storm of the season has been by far the best. Its tough to stay hopeful this late in the game but we still could get some more snow. With temperatures outside getting close to the mid fiftys I have begun to thing about putting the spring coat of pine tar on Florence's gunwales. I don't want to miss high water on the Yellowstone.

As we head into the spring I am polishing off the construction drawings for Enki, you will remember her from these blog posts. Higher capacity, lower wind profile, shallower draft, and a better deck layout make her a step up from Florence.


As you can see the build plan is just a rough outline(a blurry one to boot!), as I polish it up you will be able to find it here in the blog. So enjoy the end of the winter, boating is just around the corner.